Spring Bone Rigging
Spring Bones are a convenient means of adding physics elements to a character. When used in a real time engine such as Unity, they offer a performance friendly means of doing real-time physics simulation that would otherwise be detrimental to performance.
The examples discussed below involve the use-case of:
Setup
Import of a character with a hairstyle from Character Creator.
The addition of weighted bones in Blender to control parts of the hair.
Usage
Exort of the character along with the spring bones to Unity for usage with either the Dynamic Bone or Magica Cloth 2 add-ons for physics simulation.
Re-Export of the spring bones back to Character Creator (with some significant limitations). Please note that whilst Dynamic Bone will only do spring bone simulation, Magica Cloth will do both Spring Bone and Cloth simulation and as such, offers a high performance alternative to the built in Unity Cloth Physics.
Further Usage
Spring bones can also be utilized in Blender where the physics simulation utilizes a ‘Rigid Body World’ type simulation; please see the Spring Bone Usage In Blender section of the documentation for more details.
Blender Spring Bone Workflow
Preparation and Import
Prepare a suitable character in Character Creator which contains objects you wish to perform spring bone physics simulation on (in Unity).
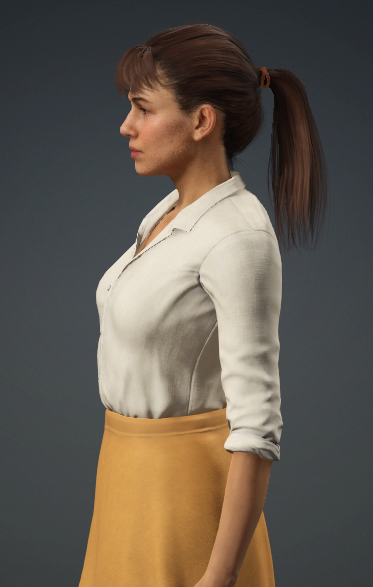
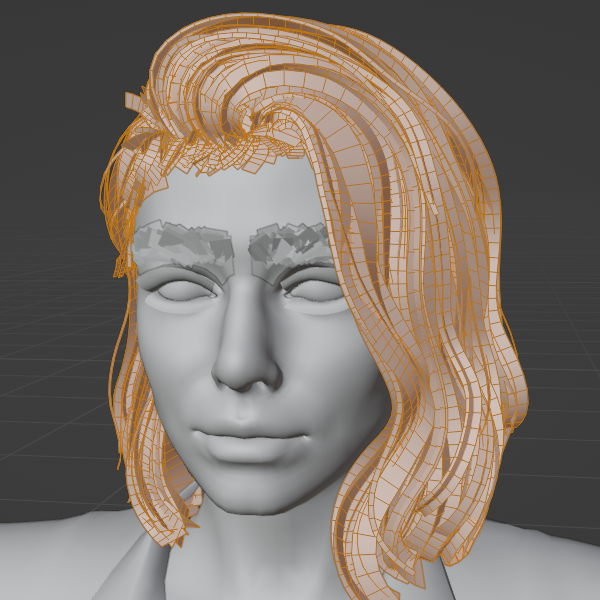
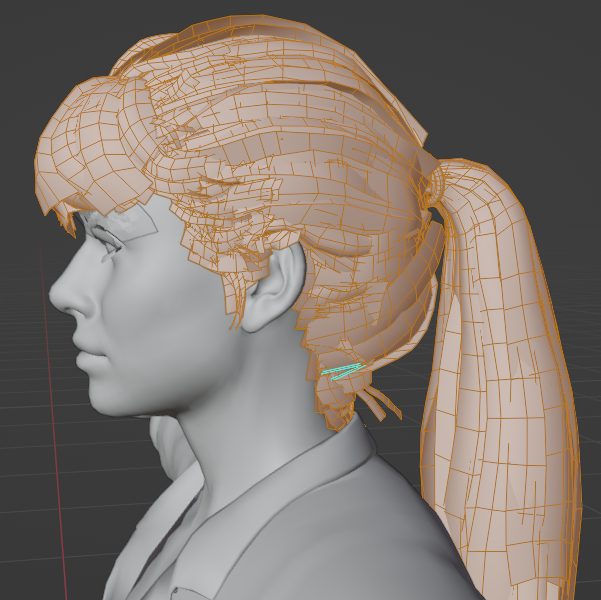
Example character with a ponytail hairstyle
To setup spring bones for Unity: Export the character using the CC4 Blender Tools Plugin add on for CC4 (see link for details; The plugin is available here CC4 Blender Tools Plugin) using the Round Trip Export For Unity export options.
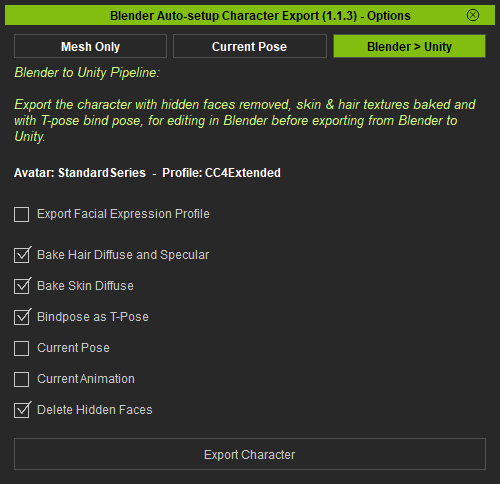
Round trip export options for Unity destination
To setup spring bones for Character Creator: Export the character using the CC4 Blender Tools Plugin add on for CC4 (see link for details; The plugin is available here CC4 Blender Tools Plugin) using the Blender Round Trip Workflow export options.
Import the character into Blender with the CC/iC Blender Tools using the Standard Import procedure.
Once the character is imported, then new bones can be added with the tools in the ‘Spring Rig’ panel of the ‘CC/iC Create’ tab of the CC/iC Blender Tools.
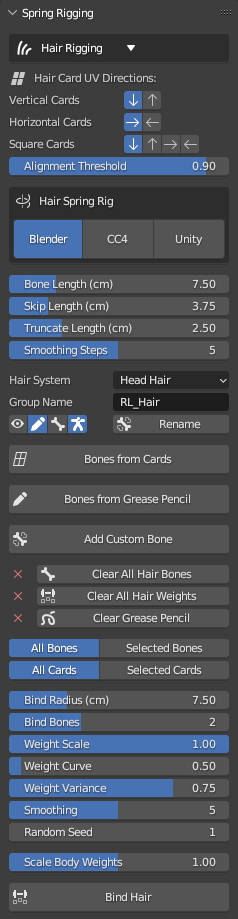
Creating the ‘Spring Rig’
The ‘Spring Rig’ is essentially an extension of the existing character skeleton which when complete will only exert influence on the hair objects of the character.
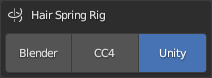
The end use target application for the spring bones can currently be either Character Creator or Unity (A spring bone solution for dynamic animation in Blender is currently WIP). The correct end-use case should be set using the ‘Hair Spring Rig’ switch in the ‘Spring Rig’ pane of the ‘CC/iC Create’ tab.
Three principal methods for adding new bones to the character are available:
|
Hair Card Method: Spring Bones are programmatically added to individual ‘Hair Cards’ (i.e. individual polygon strips that are commonly used to represent groups of individual hairs in 3D hair models). |
|
Grease Pencil Method: Spring Bones are programmatically added that follow the path of lines drawn on the model surface with the Blender Grease Pencil. |
|
Custom Placement Method: Bones can be added (again as part of the character skeleton) and subsequently positioned and extended by hand. |

All of these methods can be used simultaneously, should you wish to. The structure of the hair mesh is perhaps the largest determining factor in which method to use.
If the hair mesh contains obvious and clearly defined hair cards, then adding bones to individual hair cards will be a simple process.
|
|
Character Creator hairstyle containing hair cards. |
Blender view with very clearly defined hair cards. Suitable for the ‘Hair Card’ method. |
On the other hand if any hair cards are poorly defined (or absent), then use of the grease pencil will be more productive.
|
|
Character Creator hairstyle with a dense mesh (made from hair cards). |
Blender view of the mesh with a higher density hair card structure. Suitable for the ‘Grease Pencil’ method. |
Trianglulated meshes can present some problems in determining how to place any spring bone chains, since the ‘direction’ of the hair can only be estimated from the mesh. This may require initial placement with the grease pencil or manual placement, followed by manual adjustment as needed by the mesh.
Hair Card Method: Basic workflow
The principal requirement for adding bones to hair cards is that you must enter ‘Edit Mode’ for the hair object and use ‘Face Selection Mode’. So the (highlighted) icons below should be shown at the top of the viewport window.

In Edit Mode + Face Selection Mode, simply select one face on the hair card:
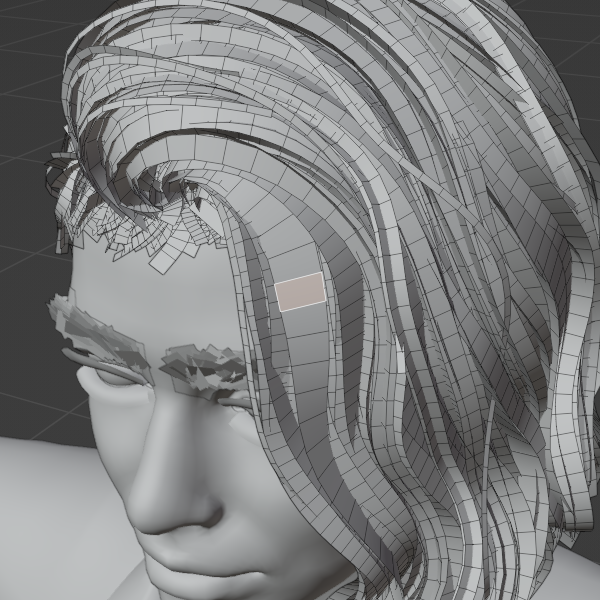
Single face selected on the hair card
Set the parameters for the desired Bone Length (shorter lengths will create more bones to fill out the length of the hair card); Skip Length the distance from the start of the hair card that you want the initial bone to be placed at; Truncate Length the distance from the end of the hair card to stop generating bones; Smoothing Steps how much smoothing to apply to the curve generated from the grease pencil stroke or the actual hair card.
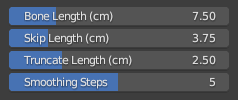
Press the ‘Bones from Cards’
 button to add a set of spring bones along the hair card using the above parameters for bone length and initial positioning.
Spring Bones added along the hair card
Should you wish to adjust the parameters, then (with the hair card still selected) simply edit the values as needed and click on ‘Bones from Cards’ and the spring bones will be recreated with the new parameter values.
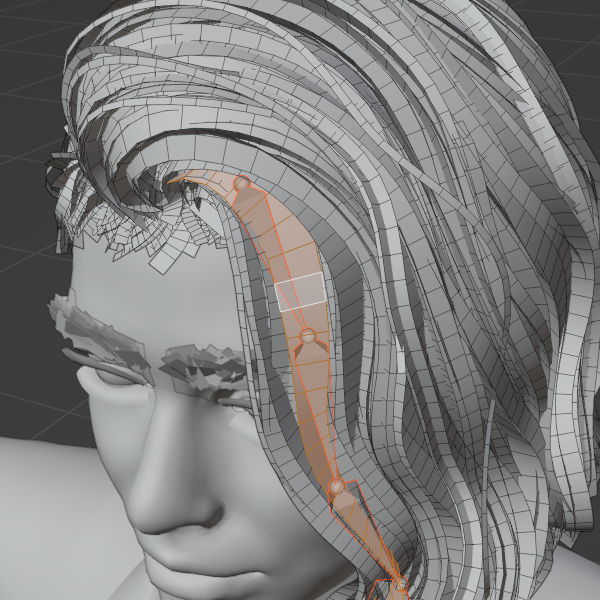
Bones, bone weights and even grease pencil marks may also be easily removed using the ‘Clear’ buttons - this can be specifically performed for either ‘All Bones/Cards’ or ‘Selected Bones/Cards’ using the provided selection toggles. The last added bones are automatically selected by default - to change or extend the selection then enter ‘Edit Mode’ for the bone object and select any single bone of a spring bone chain to include it in the selection. Hair cards must also be selected/deselected in ‘Edit Mode’.
‘Clear’ Buttons
Spring Bones can be added to as many or few hair cards as you require (you DO NOT need to to add bones to every hair card).
Grease Pencil Method: Basic Workflow
Using the grease pencil method to add bones to the ‘spring rig’ is extremely simple. The basic requirement is that a single stroke (line) is drawn on the surface of the model to represent each bone chain that will be added. Any number of bone chains can be added by this method.
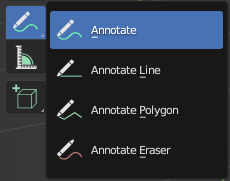
In order to draw a grease pencil stroke onto the surface of the model, you must be in ‘Object Mode’ and the ‘Grease Pencil - Annotate’ tool active (set in the left hand side tool bar)
Grease Pencil - Annotate mode
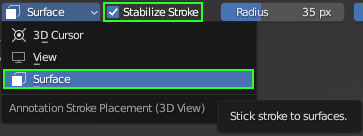
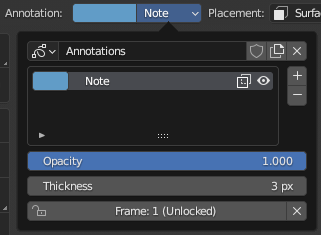
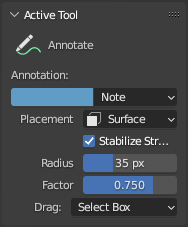
In the grease pencil tool strip at the top of the viewport set the ‘Placement’ to ‘Surface’ and check the ‘Stabilize Stroke’ box.
Grease Pencil - Settings
Tip
The grease pencil can be easily activated with the above settings by clicking on the grease pencil icon  (shown highlighted) in the mini tool strip of the spring rig pane.
Once you are finished with the grease pencil, then click the button again to deactivate it. This return the active tool to ‘Select Box’.
draw a stroke onto the model in the position that you want to place a chain of bones
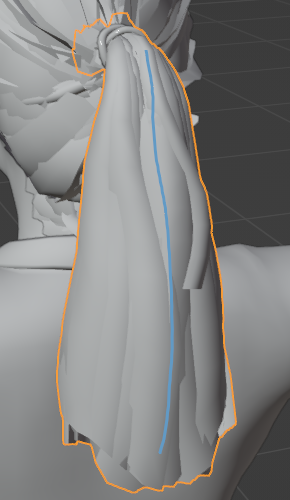
Drawn Grease Pencil Stroke
After drawing the stroke you have the opportunity to change the color of the stroke by clicking on the ‘Annotation’ color in the grease pencil tool strip.
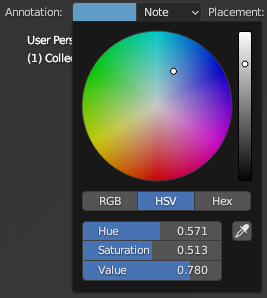
Annotation Color Settings
The drawn stroke can now be converted into a chain of bones according to the parameters for the desired Bone Length (shorter lengths will create more bones to fill out the length of the hair card) and Skip Length: the distance from the start of the hair card that you want the initial bone to be placed at.
Press the ‘Bones from Cards’
 button to add a set of spring bones along the grease pencil stroke using the above parameters for bone length and initial positioning.
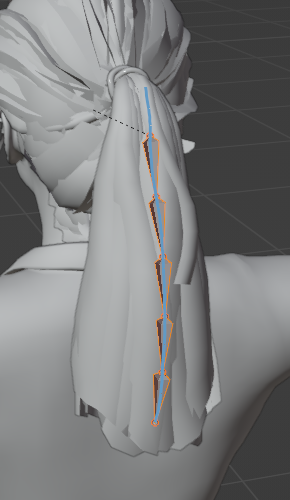
Bone chain added along grease pencil mark
After the addition of the bone chain, the grease pencil stroke can be removed and a new one drawn to continue the bone adding process.
Tip
Any generated bones can easily be repositioned in ‘Edit Mode’ if the auto-generated position is for any reason unacceptable.
Grease Pencil Method: Advanced Workflow
The grease pencil can be used in a more sophisticated way where multiple annotations can be placed in their own annotation layers or ‘Notes’ and then the bones can be generated for selected layers. This avoids either having to remove exiting grease pencil strokes when using different settings for different bones.
The annotation layers can be accessed as follows:
Activate the annotation tool when in object mode.
Grease Pencil - Annotate mode
In the grease pencil tool strip at the top of the viewport set the ‘Placement’ to ‘Surface’ and check the ‘Stabilize Stroke’ box.
Draw the initial stroke onto the model (this step will allow access to annotation layers).
After the first stroke is drawn, a ‘Note’ dropdown menu will appear in the top tool strip - click that to manage the annotation layers.
The annotation layers can also be managed from the ‘Active Tool’ pane of the sidebar ‘Tool’ tab (accessed by pressing the N key).
Add a new layer to the annotations with the ‘+’ button. Each layer can have a different color if desired.
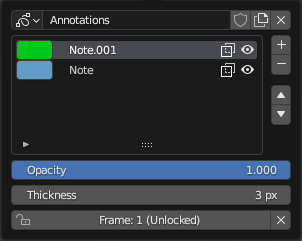
With the new layer selected, new strokes can be drawn onto the model.
The
button will now only generate bone chains for grease pencil strokes that are in the currently selected layer.
grease pencil annotation layers - work in object mode so the bones can be selected discuss the selection toggles and their power - quick access to notes
Custom Placement Method: Basic workflow
A custom bone may be added at any time (in Edit Mode or Object Mode) by clicking on the ‘Add Custom Bone’ button. This will immediately enter edit mode for the skeleton and only display the spring rig bones (the original main skeleton bones are in a layer whose visibility is toggled off) along with the character. The newly added bone will be automatically selected.
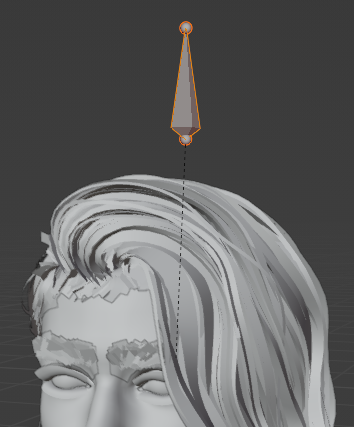
Newly added bone
To conveniently position the bone on the character, use ‘Face Project’ snapping (selected from the top bar snapping tool)
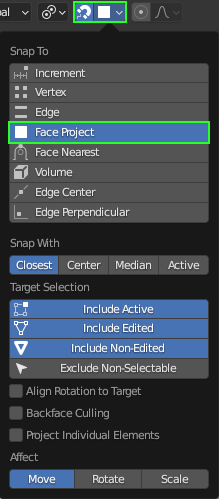
Face Project snapping
Now when selecting and dragging the bone tips, they should snap to the projected surface of the character. Extending the bone chain with E will then allow easy positioning on the model surface.
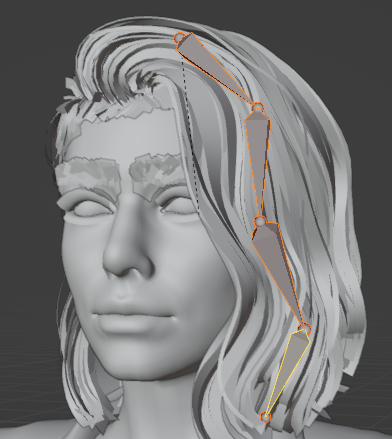
Extended bone chain placed with surface snapping
Bone Visibility
The visibility of the added spring bones and the original skeleton bones can be toggled through use of the visibility toggle  . The appearance of the bones can be cycled through using the bone style button
  .
.
Weight Painting the Spring Rig
Note
Before beginning weight painting, please ensure that the correct end-use case is set using the ‘Hair Spring Rig’ switch in the ‘Spring Rig’ pane.
Once the bones have been added to the spring rig, their influence can be automatically weight painted onto the appropriate hair mesh (or meshes) using the ‘Bind Hair’ button (with the hair object or objects selected).

Tip
In the case of a single hair object, then that object must be selected in ‘Object Mode’ before pressing ‘Bind Hair’. When there are multiple hair objects, then each object that you wish to paint influence onto must be multiple selected (shift + select) before using ‘Bind Hair’.
Note
Since the weight painting is done programmatically, the algorithm used can identify the hair card structure and weight paint the bone influences in such a way that the hair cards will not be stretched when deformed. This will greatly minimize stretching distortion and look much more like real hair.
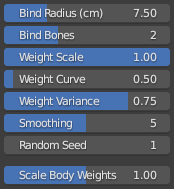
The selected hair object will be weight painted according to the user defined parameters below:
|
Bind Radius - How wide a radius around the bones should the hair cards bind vertex weights to.
|
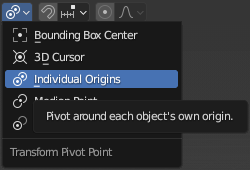
After binding, the bones will be shown in ‘Pose Mode’ where the results of the binding can be explored. The binding results can be best seen if you set the ‘Transform Pivot Point’ to Individual Origins (shown below). When rotating, this setting will obey the connectivity of the selected bones in the chain and effectively cause the chain to ‘curl’ as opposed to moving as one static object.
It is recommended that for each bone chain created, select all the bones (in ‘Pose Mode’ select one bone then press Shift + L to select all linked) and rotate them (R key - and restrict axes with the x,y or z keys) to see the subsequent mesh deformation.
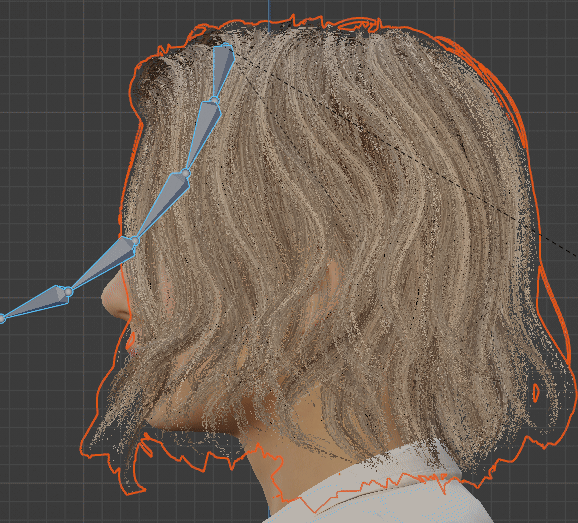
Hair deformation with single bone chain (single sample viewport)
Weighting Variance
The ‘Weight Variance’ value used in the hair binding can have a very pronounced effect. This weight paints each hair card slightly differently, so that any bone movement will have a different effect on each ‘strand’ or rather ‘group of strands’.
Note
Individual hair cards are programmatically weight painted with equal weights laterally across the width of the card - so that they aren’t stretched by bone movement. When combined with each card being painted differently, this produces a very natural looking range of motion of groups of hair strands (represented by a hair card).
A low ‘Weight Variance’ value will produce a weighting where all of the hair cards are similarly weighted and mill be ‘moved together’ by the deforming bones.
A high ‘Weight Variance’ value will produce a weighting where the hair cards are weighted very differently, meaning that they will be moved quite differently from each other by the deforming bones.
|
|
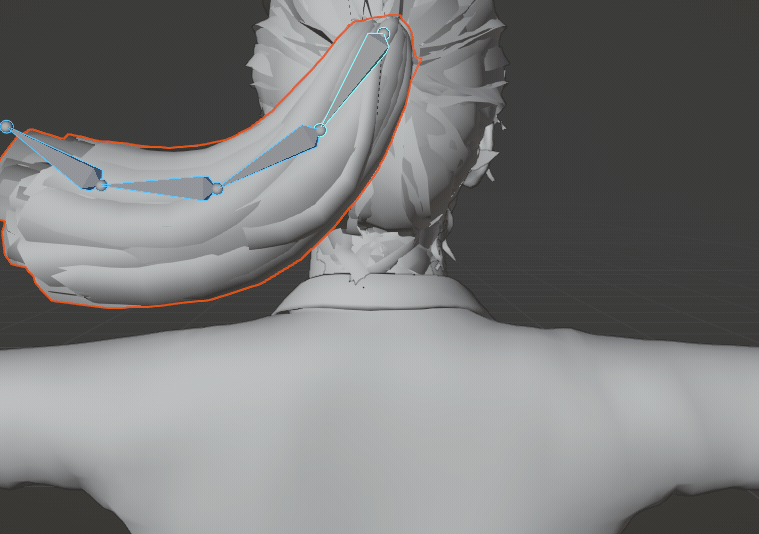
Low Variance (0.05) - All of the hair cards move together as the bone chain deforms the mesh. |
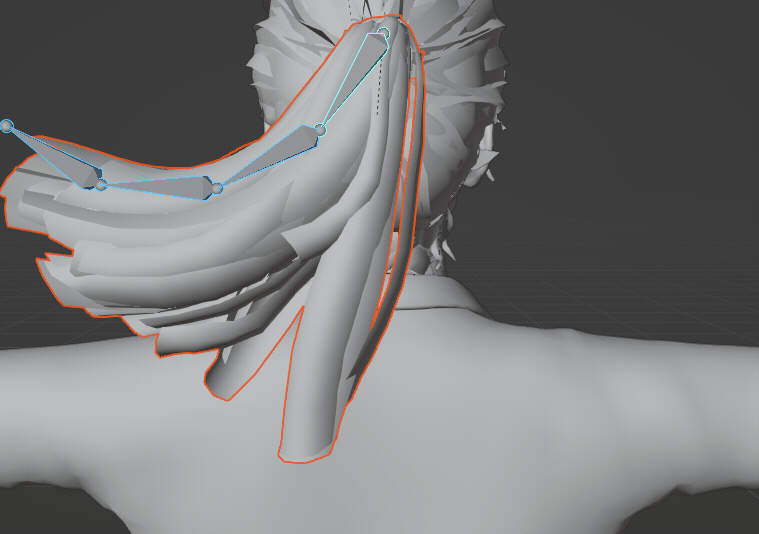
High Variance (0.95) - The hair cards are now moved to differing extents (without stretching) as the bone chain deforms the mesh. |
The video below is a render of the spring bone simulation with a single spring bone chain deforming the ponytail - being acted on by a variable force field. The hair is weighted to the bone chain with a weight variance of 0.75 (default). This illustrates that quite complex and subtle motion can be created even when only a single bone chain is being used.
Exporting to Unity
Prior to ‘Rigifying’ the character, export of the character + spring rig can be performed using the ‘Export to Unity’ button in the Import/Export foldout of the CC/iC Pipeline Tab. This allows Exporting as a .Blend file or Exporting as FBX (follow the links for the relevant documentation sections).
After ‘Rigifying’, the character + spring rig can only be exported using the Mesh/Motion Export function - outlined in the Exporting after Rigify section of the documentation. This will produce a Unity compatible export.
In the case of a character which has simply had a ‘spring rig’ created & weighted, and then exported: The exportted character + spring bone rig can be used in unity provided that the Dynamic Bone package is installed into the Unity project.
Exporting back to Character Creator
Returning a character with added spring bones to CC4 can have some significant complicating factors.
When returned to CC4, the hair rig is treated as a separate accessory object. This separate object is pinned to its original position on the character.
The accessory object will no longer obey deformation from the original skeleton; only deformation from the hair rig.
The hair may then be deformed in unpredictable ways, most likely resulting in unacceptably poor positioning of the hair.
Tip
If you wish to have any part of a character’s hair governed by spring bones, then limit those parts to already separate objects which do not move dynamically - such as a Ponytail.