Advanced Usage
Morph Editing
This section is to facilitate creating character morph sliders for Character Creator. The typical process is to import a character, adjust the mesh, with the mesh editing and sculpting tools, for the shape of the morph. Then export the new mesh back to Character Creator to be made into a morph.
There are two main ways of achieving this. One is with an FBX character export, the other with an OBJ character export. The procedures for exporting and subsequent re-importing are different for each.
Character Creator also requires that an FbxKey or ObjKey must be generated by the export process and used in the re-import process. This key is uniquely generated for each character export and is conditional on certain export settings.
Exporting a Character FBX with FbxKey (From Character Creator)
Export from the file menu: File -> Export -> FBX (Clothed Character)
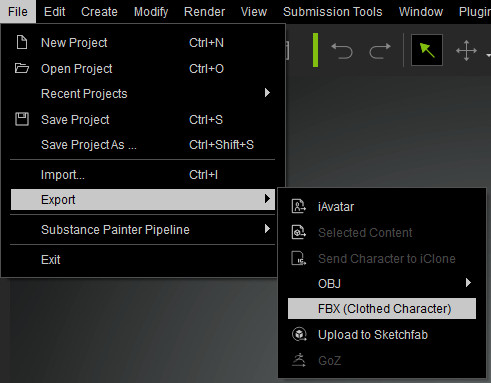
With the options:
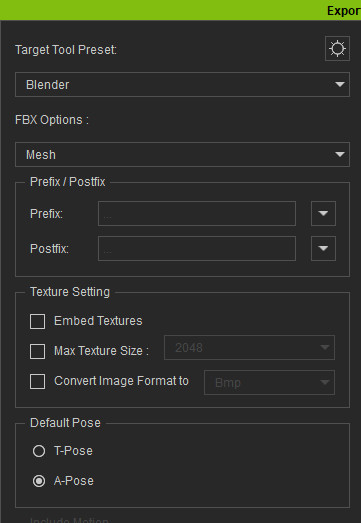
Target Tool: Blender
FBX Options: Mesh
- Texture Settings: Any
Generally best not to embed textures.
Do not convert to BMP
Default Pose: Any
Exporting a Character OBJ with ObjKey (From Character Creator)
Export from the file menu: File -> Export -> OBJ -> Nude Character in Bind Pose
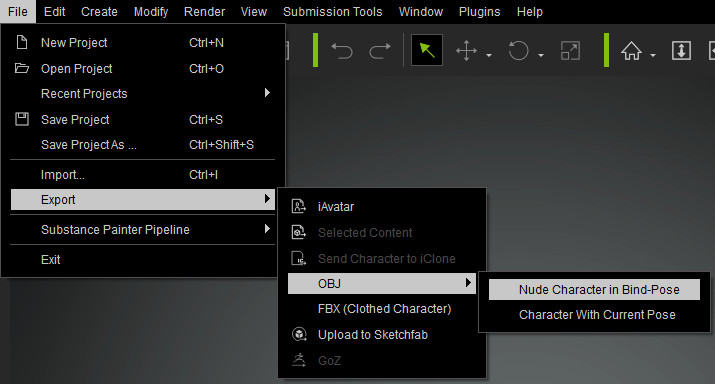
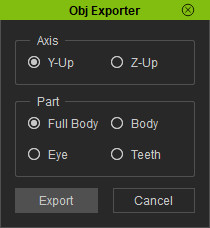
With the default options:
The Nude Character in Bind Pose export does not generate any materials, which means that the import into Blender will have no textures.
Import For Morph Editing
Perform a Standard Import of the exported character without animation; also Physics should not be applied for morph creation.
If an FbxKey or ObjKey file is present (created using either of the processes outlined above) then the character is suitable for editing with subsequent export back to Character Creator.
In the absence of a suitable Fbx or Obj Key the Export to CC3/4 function will be unavailable.
Export Character Morph
Once you have altered the character to your satisfaction you can export it back to Character Creator using the Export to CC3/4 button in the Exporting pane of the add-on.
Importing a Character FBX with FbxKey (Back into Character Creator)
Import from the File menu: File -> Import…
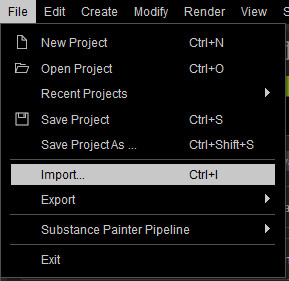
Find and select the FBX file exported from Blender.
Before the import begins you should be presented with the “Create Assets” window. It should have the Decrypt Key (i.e. the FbxKey) automatically filled in as it is copied with the FBX export.
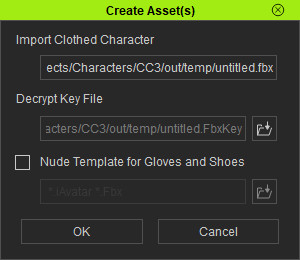
Press OK to continue the import. After a while you should be presented with a status report window summarizing the contents. Any problems with the import will be displayed here.
If this fails with a decrypt key warning, this means that the character body mesh is not the same topology as was originally exported from Character Creator. There can be no changes to the mesh vertex structure or order. You can deform the mesh as much as you like but you cannot add or remove any vertices or faces from the character body mesh. Some Blender modifiers may also re-arrange the vertex order and make the mesh invalid.

Press OK and the import process will complete. Note: The import character process does not re-import the textures and you will be left with an textureless character. However you can still make morph sliders from this character.
Create -> Head & Body Morph Sliders
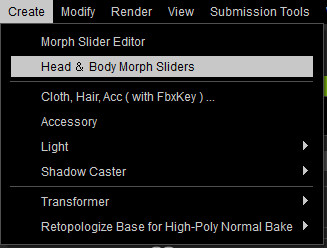
And this will create a full body head/body slider you can apply to the neutral character base.
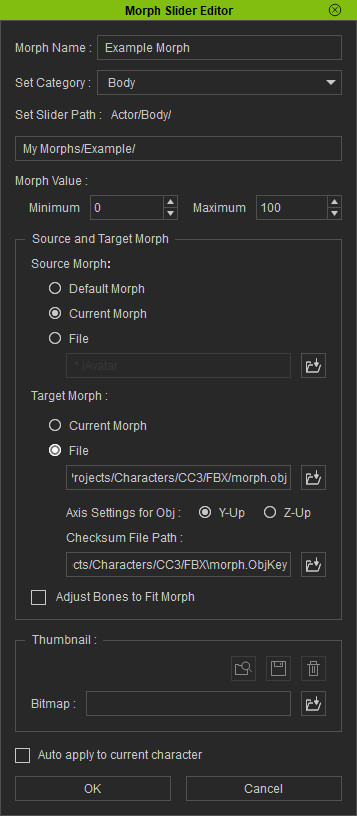
Importing a Character OBJ with ObjKey (Back into Character Creator)
This time we import from the Create menu: Create -> Morph Slider Editor
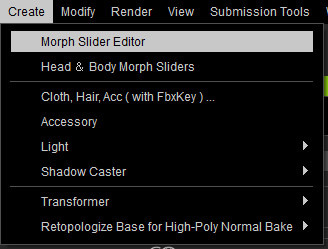
Here we create a morph slider directly from the OBJ file.
You can select the default morph as the source morph to create a full body morph for the neutral base.
Or you can select the current morph as the source morph to create a morph relative to your current character.
In the target morph, select the OBJ file exported from Blender. The Checksum File (i.e. the ObjKey) should be filled in automatically as it is copied during the export.
Accessory Editing
Export Accessory

Exports the selected object as an accessory for Character Creator. This does of course require you to make your own model.
Frame Dropping
Frame dropping during playback is a convenient means of viewing real time playback of the animation. This does have some limitations.
Playback of Blendshape animation may be erratic in a Material Shaded or Rendered Viewport.
Initial playthrough of Cloth Simulations will be entirely broken.
To enable or disable frame dropping: In a Timeline window, click on the Playback dropdown.
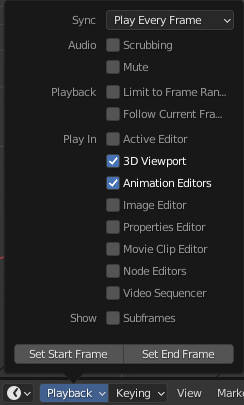
In the Sync section click the dropdown and choose whichever Sync Mode you require.
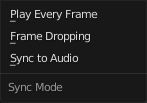
NB Remember to reset this to ‘Play every frame’ in order to properly re-calculate cloth simulations.