Notes on Remapping Functions
Blender’s Map Range shadernode allows the user to take values from a color channel (typically in the range 0.0 - 1.0) and remap those values to a user defined range. As such it will take a source bitmap and re-scale it’s values to start and end at a user defined minimum and maximum.
The shader node is found under Converter -> Map Range in the add node menu.
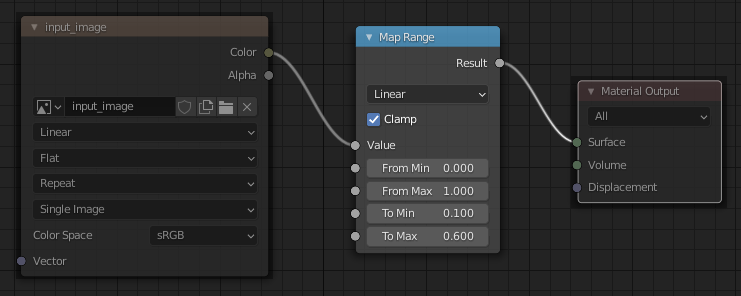
Converter Node: Map Range
Important
The effect of remapping is perhaps best illustrated using histograms. The first image below is the histogram of an RGB image which has a full range of values.
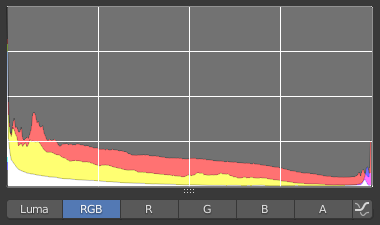
Non-mapped RGB image
Passing this image through a shader node which remaps the full range 0.0 - 1.0 into a smaller range (in this case 0.1 - 0.6) will give the following histogram.
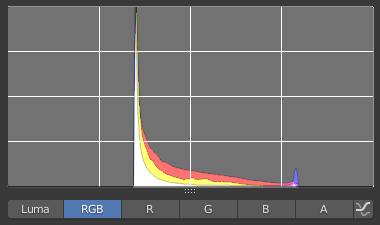
Re-mapped RGB image (0.1 - 0.6)
An important feature to note is that all the values below 0.1 and above 0.6 are absent, and that the whole range of the initial histogram has been squeezed into this new narrow range.
A slightly different range can produce even more compression (the range below being 0.2 - 0.8)
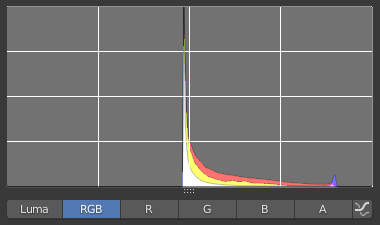
Re-mapped RGB image (0.2 - 0.8)
This a very powerful function (especially with for example roughness maps), but it may also prove to be quite destructive if misused. Caution is advised.
Note
The histograms are presented here in a non-linear perceptual space (which allows for the non-linear frequency response of the human eye), hence the slightly odd looking positioning of the start and end of the output ranges on the histogram.